Laser cutting is a fantastic technology that allows you to create intricate designs and precise cuts in various materials. However, to achieve the best results, it’s essential to understand the right settings for your laser cutter based on the material you’re using.
If you want the laser cutting machine to obtain the best cutting effect, use material settings Very important, In this blog post, we’ll explore the optimal settings for different materials, common challenges, and tips to improve your cutting experience.
Laser Cutter Settings
Before you start laser cutting a material, you need to understand the basic settings of the laser cutting machine. The main settings are power, speed and frequency.
1. Power
Power refers to the strength of the laser beam, usually measured in watts (W). Higher power settings mean the laser can cut through thicker or denser materials more effectively. However, too much power can burn or melt the material, leading to poor-quality cuts.
- Low Power: Ideal for thin or delicate materials.
- Medium Power: Suitable for moderate thickness and density.
- High Power: Best for thick or tough materials.
2. Speed
Speed determines how fast the laser head moves across the material. A slower speed allows the laser more time to cut through the material, resulting in cleaner cuts. Conversely, a faster speed reduces the risk of burning but may leave incomplete cuts.
- Slow Speed: Provides deeper and cleaner cuts.
- Medium Speed: Balances cut quality and time.
- Fast Speed: Quick cuts with potential for rough edges.
3. Frequency
Frequency (measured in Hertz, Hz) controls how often the laser pulses per second. Higher frequencies can produce smoother edges and finer details but may increase the risk of material discoloration.
- Low Frequency: Suitable for thick cuts with less detail.
- Medium Frequency: Good for general-purpose cutting.
- High Frequency: Best for detailed and intricate designs.
Set Laser Cutter Settings for Different Materials
Different laser cutting machines can cut different materials, metal, wood, glass, acrylic, leather, foam, etc.
Wood:
Wood is one of the most commonly used materials in laser cutting. The key to successful wood cutting lies in controlling the laser power, speed, and focus. Here are some general settings to consider:
- Power: 60-80% (varies based on wood type)
- Speed: 100-300 mm/s
- Focus: 2-3 mm above the material
Acrylic:
Acrylic is another popular material for laser cutting, and it requires a different approach. To prevent charring and achieve a smooth finish, consider the following settings:
- Power: 20-80%
- Speed: 20-150 mm/s
- Focus: 0.5-1 mm above the material
Leather:
When cutting leather, it’s important to maintain precision and avoid excessive burning. Try these settings:
- Power: 40-60%
- Speed: 50-100 mm/s
- Focus: 1-2 mm above the material
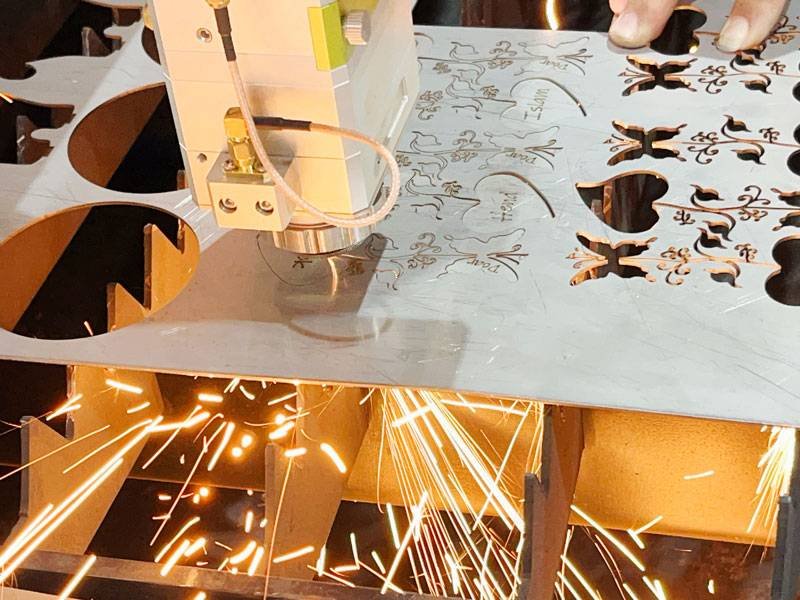
Metal:
Laser cutting metal is a complex process that often requires a higher-power laser. Settings can vary greatly depending on the type and thickness of the metal, but here are some general guidelines:
- Power: 80-100%
- Speed: 0.1-2 mm/s
- Focus: 0.1-2 mm above the material
Paper:
Paper is a delicate material, and the settings must be adjusted to avoid burning or tearing. Use the following settings as a starting point:
- Power: 10-30%
- Speed: 200-400 mm/s
- Focus: 0.5-1 mm above the material
Fabric:
Laser cutting fabric offers precise, clean cuts. To ensure the best results, try these settings:
- Power: 30-50%
- Speed: 50-150 mm/s
- Focus: 1-2 mm above the material
Foam:
Foam materials, like EVA or foam core, are popular for crafting and prototyping. Here are some recommended settings:
- Power: 30-50%
- Speed: 50-150 mm/s
- Focus: 1-2 mm above the material
Step-by-Step Guide to Adjusting Laser Cutter Settings
Step 1: Identify the Material
Determine the type and thickness of the material you want to cut. Different materials react differently to laser beams, so knowing your material is the first step.
Step 2: Set the Power
Start with a lower power setting and gradually increase it until you achieve a clean cut without burning or melting the material.
Step 3: Adjust the Speed
Set the speed based on the material thickness. Thicker materials require slower speeds, while thinner materials can be cut faster.
Step 4: Configure the Frequency
Choose the frequency based on the level of detail needed. Higher frequencies are better for intricate designs, while lower frequencies are suitable for straightforward cuts.
Step 5: Perform a Test Cut
Always perform a test cut on a scrap piece of the material to ensure the settings are correct. Adjust the settings as needed based on the test results.
Step 6: Fine-Tune the Settings
Make minor adjustments to power, speed, and frequency to perfect the cut quality. This may involve multiple test cuts to get everything just right.
Factors Influencing Laser Cutter Settings
Material Thickness
Thicker materials require higher power and slower speeds to ensure a complete cut. Thinner materials need less power and faster speeds to prevent burning.
Material Type
Different materials absorb laser energy differently. For example, wood and acrylic respond well to CO2 lasers, while metals require fiber lasers for effective cutting.
Desired Cut Quality
Higher precision cuts with smooth edges require lower power and higher frequencies. If speed is more critical than quality, you might opt for higher power and faster speeds.
Laser Cutter Type
The type of laser cutter you’re using (CO2, fiber, diode) affects the settings. Each type has its own optimal range for power, speed, and frequency.
Ventilation and Cooling
Proper ventilation and cooling systems can impact the cutting quality and the longevity of your laser cutter. Overheating can lead to inconsistent cuts and damage to the machine.
Troubleshooting Common Laser Cutting Issues
1. Burning or Melting
Cause: Too high power or too slow speed.
Solution: Reduce the power and increase the speed to prevent overheating and burning the material.
2. Incomplete Cuts
Cause: Insufficient power or too fast speed.
Solution: Increase the power and/or decrease the speed to ensure the laser can penetrate the material fully.
3. Rough Edges
Cause: High frequency or improper focus.
Solution: Lower the frequency and ensure the laser is correctly focused on the material for cleaner cuts.
4. Excessive Smoke
Cause: Incorrect settings or poor ventilation.
Solution: Adjust the settings to reduce burning and ensure your laser cutter has adequate ventilation to remove smoke and fumes.
5. Material Shifting
Cause: Movement of the material during cutting.
Solution: Secure the material firmly to prevent shifting. Use clamps or weights if necessary.
Is Laser Engraving Settings the Same as Laser Cutting?
Different, laser engraving settings for different materials are also designed differently. Laser engraving only produces logos, text, graphics, etc. on the metal surface. Cutting machines and engraving machines have great differences in power consumption, speed and PPI. For large differences, you can refer to the laser cutting equipment user manual to determine the correct cutting and engraving settings.
Is It Dangerous to Use Incorrect Laser Cutter Settings?
There is danger. The laser will produce high-energy heat and has strong penetrating power. If the laser cutter settings are incorrect, it will cause many dangers. Therefore, you need to pay attention to protective measures. Do a good job before starting the machine and do a good job when shutting down to ensure safety.
Conclusion
Understanding how to set up your laser cutter based on different materials is crucial for achieving great results in your projects. By adjusting power, speed, frequency, and focus according to each material’s unique properties, you can create beautiful cuts and engravings with ease.
FAQ
1. What are the best laser cutter settings for wood?
For wood, use a power setting between 50-70%, a speed of 20-30 mm/s, and a frequency of 500-1000 Hz. These settings help achieve clean cuts without excessive burning.
2. Can I use the same settings for cutting acrylic and wood?
No, acrylic typically requires higher power (60-80%) and faster speeds (30-50 mm/s) compared to wood. Adjust settings based on the material’s thickness and type for optimal results.
3. How do I prevent burning when cutting fabric?
To prevent burning fabric, use lower power settings (30-50%), higher speeds (40-60 mm/s), and moderate frequencies (500-1000 Hz). Test on a scrap piece first to find the best settings.
4. What laser settings are ideal for cutting metal?
For metals, especially with fiber lasers, use high power (80-100%), slow speeds (10-20 mm/s), and low frequencies (10-20 kHz). These settings ensure precise and complete cuts.
5. Why are my acrylic cuts melting?
Melting acrylic is usually due to high power and slow speed settings. Try reducing the power and increasing the speed to achieve cleaner cuts without melting.
6. How can I improve the precision of my laser cuts?
Improve precision by using higher frequencies, ensuring proper focus of the laser beam, and adjusting power and speed settings to match the material and desired cut quality.
7. What should I do if my laser cutter leaves rough edges?
Rough edges can be fixed by lowering the power, increasing the speed, and ensuring the laser is properly focused. Higher frequency settings can also help create smoother edges.
8. Are there specific settings for cutting glass with a laser cutter?
Yes, cutting glass requires high power (70-90%), moderate speed (15-25 mm/s), and low frequency (200-400 Hz). Additionally, use a cooling system to prevent overheating and cracking.